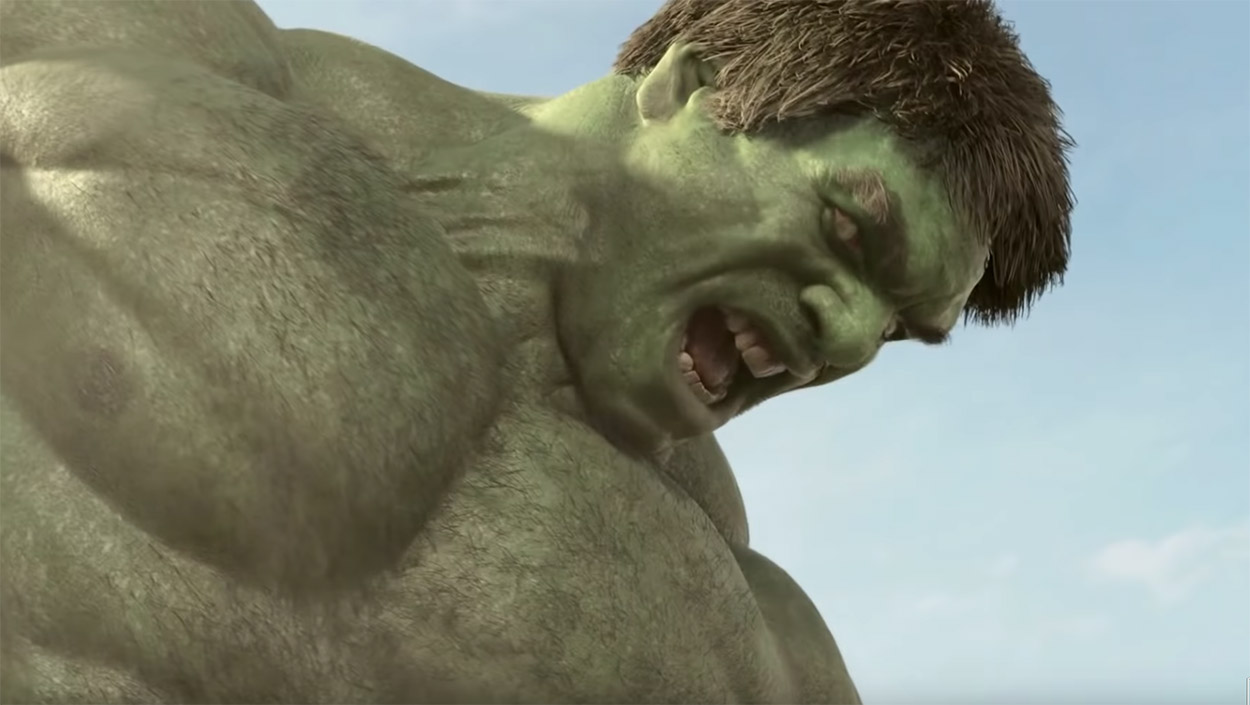
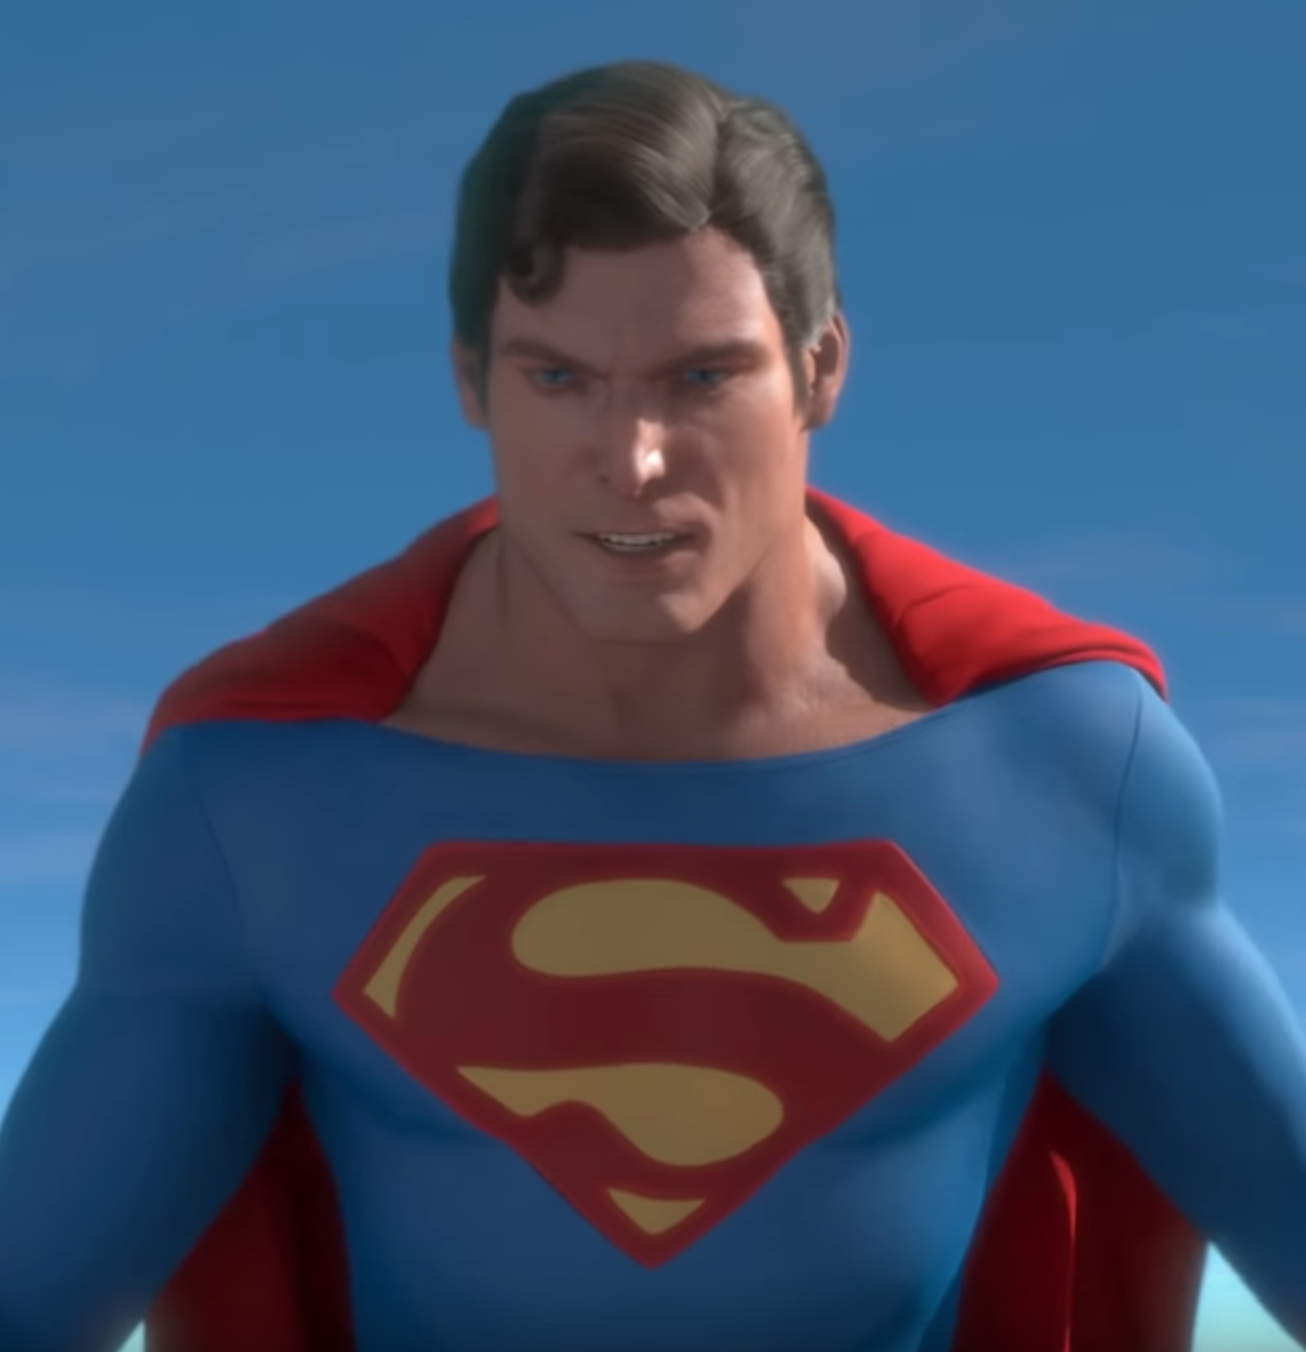
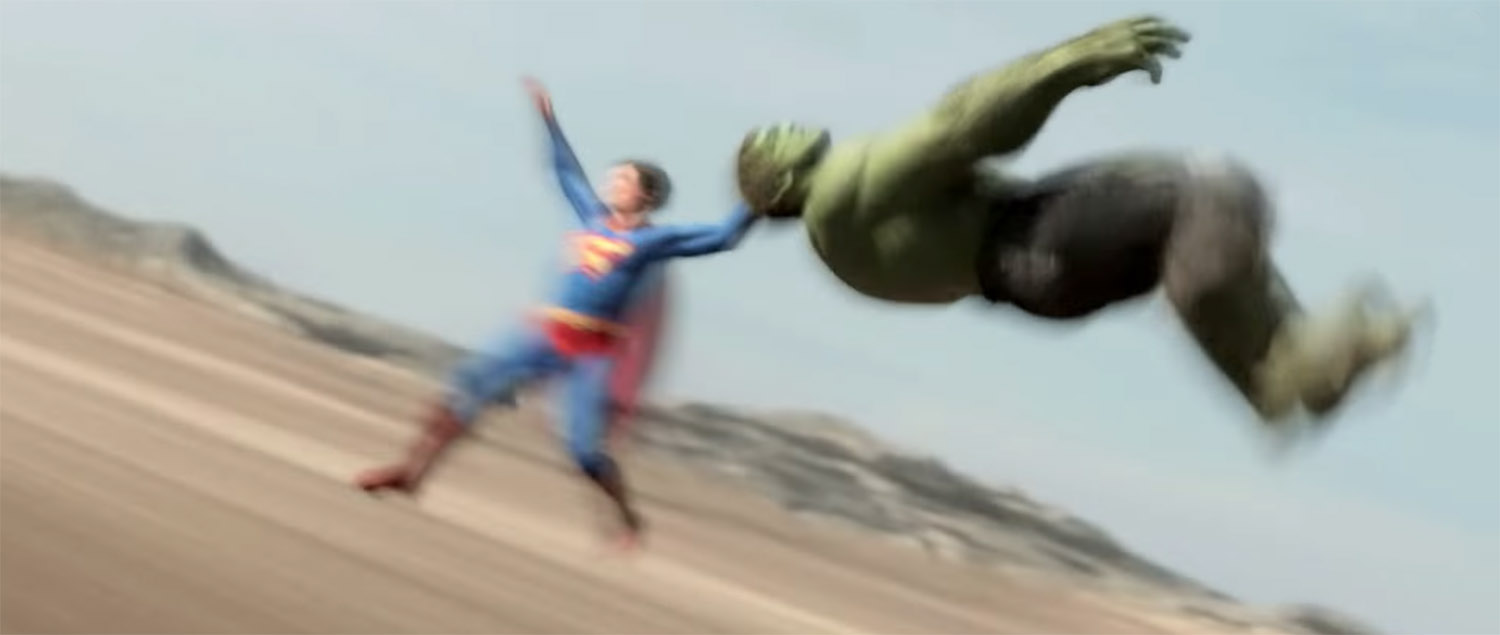
Michael Habjan is an animator currently living in Canada who has 261 Million YouTube views for his “Superman vs Hulk – The Fight” animated series. He has released 4 parts so far with one more in the works.
I’m incredibly impressed by the progression he’s made through his 4 parts and the technical and artistic level he’s reached in Part 4. It’s unlike anything else on YouTube right now. Enjoy this in-depth interview where we dig into his process.

Michael Habjan
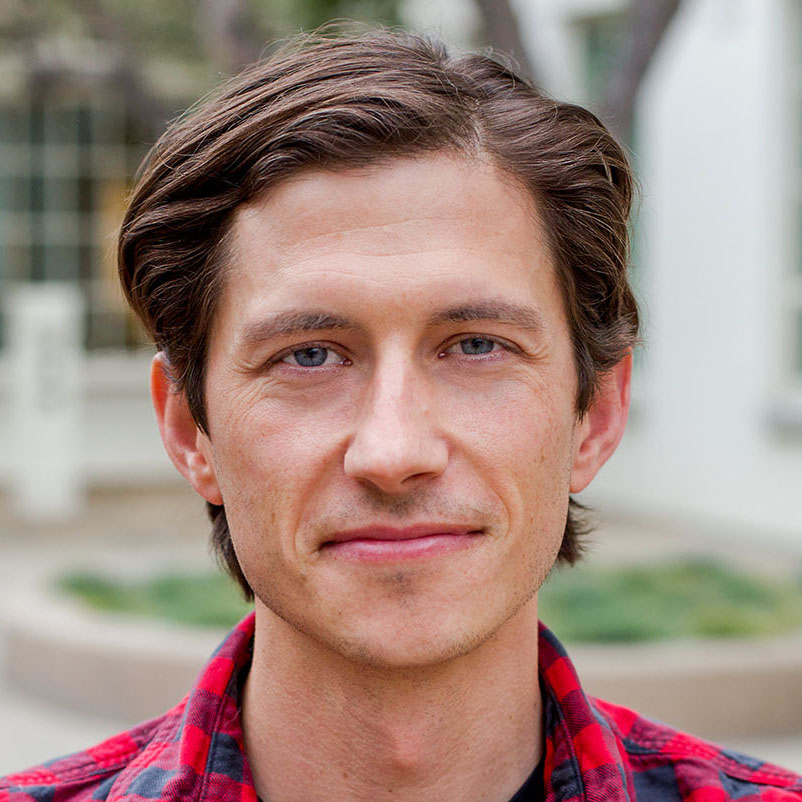
Lucas Ridley, DCS Instructor
What’s your background and how did you get started working in 3D?
I was always interested in drawing growing up, mainly my favourite characters from the movies and shows that I liked like Superman and Nina Turtles and so art was always my thing and once computers came around and you could draw using them I got into that as well. I took Digital Media arts in college and then a one year animation program and started out in modeling and rigging since I always preferred character work and wanted to make digital puppets of my favourite characters.
When you started the Hulk v Superman series what goal did you have in mind? Did you know how many parts you were going to make?
Originally I guess I wanted to make an epic 20 minute long fight scene. Being naive or not thinking it through, after working on it for a few months I realized it would take way to long to make a 20 min video so I just decided to make a 1 min teaser and get that out and then maybe add to it later when I could find the time again to work on it since I had to work other studio jobs for money and could only work on it from time to time when I had taken breaks between jobs or on the weekends. Not sure what the end goal was I just wanted to see it myself and no one else had made anything and I thought it was a something many other people would be interested in seeing. So I thought there would be value in creating it whether some how I could monetize it or it would lead to some great job.
Did you start with the fight choreography figured out or did you explore that in previs/layout pass?
There are usually some ideas in my head but then its mostly figured out and explored in blocking or layout and I build on it over time refining an idea or tossing it and adding something I think is better. But no its not figured out from start.
What technical aspect has been the most difficult in this series and how did you overcome it (or not)?
Rendering is always difficult and trying to figure out new tools and why certain things aren’t working and how to make it work. For part 4 specifically I had to figure out how to do miles and miles of desert background terrain and clouds which I had to get Terragen software for and learn how it works and how to integrate with the maya characters which was a very difficult. I overcame by just scouring the internet for the answers and just trial and error for as long as it takes to figure it out.
Who are your top 3 favorite super heroes (besides Hulk and Superman, if they are already in the top 3)?
I like Batman, the Ninja Turtles, and really like the way they do Captain America character in the Marvel movies.
It’s been over 7 years since part 1, how have you stayed motivated over the years to maintain this project?
I think just have a natural obsession with the the project and wanting to see it done. Also making each part look better than the last and improving on the rigs and models.
The quality of every aspect improves from part to part, how did you go about teaching yourself how to improve and know what you needed to improve from each part to part?
Just through trial and error, looking up tutorials, studying action sequences in movies that I think do them well like the Marvel movies. I go back at stuff I made months earlier and see if theres any way to improve on it and just over time you pick up new tricks and develop your eye for making things look a little better. Theres always a way to improve on every aspect and so just a matter of tackling each issue and figuring it out.
How did you approach animating the characters and cameras that cover such a large distance and big environment?
That took a while to figure out especially since when theres nothing to fly past it can be hard to make it look like they are moving fast but I just had to figure it out over time what camera positions and angles worked best, usually by the 4th or 5th attempt at a shot you get it. It took a while to figure it out and thankfully I have no deadlines and can just keep working on it till its working well. The broader camera noise and shake is key frame animated in Maya and then the subtler finer high frequency camera jitter handled in nuke using a camera shake node.
How did you rig his breathing, was this on special for this shot or did you have blendshapes or other deformers to achieve that?
I put breathing controls in my rigs which are necessary and its a combination of blendshapes and some set driven keys on the controls. Rib cage expand or compress and a belly expand or compress usually does the trick. I think its the best way to do it so all you have to do while animating the two different controls.
0:58 in Part 4 when Hulk is getting flown into outer space and his skin is fluttering against the wind, how was that done?
At first I tried wave and noise deformers but it looked artificial. Then I thought I would do it in comp with a distortion but I like to do things in 3D so eventually just did it by turning that part of the body that needed the skin flutter into and nCloth and then I add wind and noise till i got a decent skin fluttering effect and then i baked that out and integrate it into the rig so i can drive up the speed and amplitude in shot.
I know Maya isn’t really known for it’s fx tools so I was curious how you achieved the subtle sound barrier type of whisps coming off the characters when they’re flying fast, Hulk’s clap, and the mushroom cloud at the end of Part 4. Was this a 2d comp effect or was it all simulated in Maya?
A combination of maya fluids , particles especially for the contrails and some nuke compositing like overlays or distort. Mushroom cloud at end of part 4 I was able to find a good tutorial on that for maya fluids which worked great.
I’m starting to grasp xGen right now and I was curious if you used that for their hair?
I have recently been trying to figure out xGen and it ‘s really frustating. I find it confusing as well so I don’t know if it’s because I’m using Maya 2016 but I don’t know how to use it in animation with referenced rigs. I like it for it’s grooming short hairs and longer hair styling it’s great but I export the curves and make nHair so I can do sims and cache it out without having to do alembic caching which Xgen seems to require. I just don’t have the time and disk space to alembic caches for each shot.
I think I read somewhere you do modeling corrections per shot is that mainly for Hulk’s muscle’s or are you doing that for Superman as well with the wrinkles in his suit at the elbow, etc? What’s that process in Maya?
I don’t do alembic caching. A lot of the major sculpt fixes I incorporate into the rig but for others in shot i just take the geo, make two duplicates, sculpt the fix on one, either using Maya or in Zbrush, then I blendshape the original bound geo and the sculpt fix into the second duplicate so I get the bound geo and sculpt fix in combination and i animate the sculpt fix on or off. Then do again for the next fix and eventually have a chain of sculpt fixes and lots of duplicate geos. Its a crude way to do it and increases file size but it works and I don’t have a good shape corrector tool. I don’t use displacement maps since I prefer to see the final model in viewport and I hate working with displacement maps and would rather have hires models.
Motion blur seems like a very important aspect to these shots since they’re doing super human motions, how did you apply that? Was this baked into the render or was it a vector motion blur effect added in Nuke?
Motion blur is rendered in camera with Maya. I tried vector passes but could not figure it out and eventually gave up on it and I don’t feel the need to tweak to motion blur anyway so I just do it in render with the default maya and vray setting.
In Part 4 you mentioned you used Nuke where in the previous parts you used After Effects, why did you decide to make the switch, where there features lacking in After Effects you needed?
I just heard everyone prefers nuke and it’s the way of the future and so I thought I would adopt it and I like how it’s node based and you have the graph and was better to use for multichannel exr images. I just got sick of after effect at some point.
Do you have any other personal projects you’d like to work on once this one ends or if you could clone yourself (and your render machines) what else would you like to create?
I would like to do animations of other characters I liked as a kid like He-man or the ninja turtles, other Superman and Justice League characters and do more story driven animations with actors voicing characters and stuff like that.
It seems like you know every aspect of creating shots from start to finish. Is there something you feel like you don’t know yet or want to learn more about before other subjects?
I know the different aspects but not to the level I would like so it’s just a matter of getting more advanced in each of the aspects and learning new tricks. I want to also get better at environments so I have somewhere to put the characters other than a desert.
Will Part 5 be the last one and do you have any hints you’d like to share when it might get released if the render Gods shine down on you?
I think part 5 will leave on a cliffhanger and end it in part 6 but I really don’t know for sure it could go on and on. I have know idea when it will be released , other than improving on the character rigs I haven’t really even started animation on part 5 since I took a break from it but I will start it soon and maybe will take a few years.
What advice would you have for people interested in starting a similar project or that you would tell yourself when you started?
Just work on what is most interesting for you and you have a natural passion or obsession for so you have the self motivation to work on it for long periods of time. Don’t try to do too much at once just chip away at it everyday and keep your expectations realistic for what you’re trying to make.
Thanks Mike! That was incredibly informative!
The biggest take aways for me is that Mike does what he can with the tools he knows. He’s incredibly proficient in so many areas but he doesn’t let perfection of a workflow stand in his way of making his art. Sometimes I fall into the trap of waiting to learn the perfect way to do something before starting, but just getting it done in the best way you know how is better than not doing it at all.

- Access every course in the school library, including future courses
- Ask questions and get answers in the discussion section
- Downloadable course project files
- Access special products like new rigs
- Personalized Certificate of Completion PDFs for all 100% completed courses
- Save 25% off monthly membership by annually